
How to Schedule Paid Sessions with CalendarHero
Streamline your paid sessions with payment collection powered by Stripe.
Payment Collection is one of the newest features to be added to CalendarHero, bringing ease and automation to the way you organize paid sessions. Enable Payment Collection to allow an invitee to schedule time with you and make a credit card payment at the same time.

This new feature simplifies scheduling for consultants, trainers, and anyone else charging booking fees. Plus, payments are fully secure and powered by our Stripe integration.
Keep reading to learn how to schedule one-on-one meetings and collect payments automatically.
How it Works
Turn on Payment Collection to allow customers to make a payment in the currency of your choice when self-booking a meeting with you. Specify your payment amount, add custom payment terms, and sit back and relax. Your payments will collect in your Stripe account right away and a receipt will be issued to your invitee automatically.
All of this saves you from the extra step of invoicing your customers separately and ensures invitees pay before you meet.
1. Connect to Stripe
If you don’t already have a Stripe account, you’ll need to create one before using this new feature. Once you have a Stripe account, connect it to CalendarHero.
Note: Payment Collection is only available on the CalendarHero Professional and Team plans.
How to add Stripe as an individual:
B. Go to Integrations > My Integrations > Add
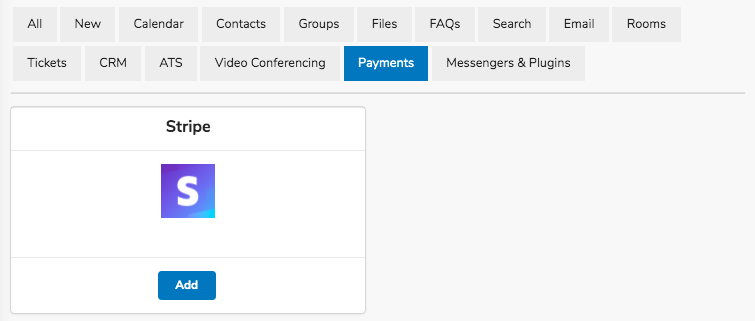
C. Click the “Payments” tab and then click “Add” under Stripe
How to add Stripe as a team or company:
If you’re the administrator of a Team plan, you can add Stripe as a corporate-wide integration. Individual team members will still be able to choose to enable or disable it from their meeting types.
B. Go to CalendarHero > Integrations > Add
C. Click the “Payments” tab and then click “Add” under Stripe
2. Add Stripe to a Meeting Type
After you've added Stripe to your CalendarHero account, enable the payment collection feature in a meeting type. Why? This feature can only be activated when connected to a meeting type. That way, you'll only collect payments with specific meetings instead of all of them. Phew!
Select a meeting type and click "edit" or create a new one. Under Collect Payments, choose "on" to enable payment collection with meetings booked with your meeting type.
Then, specify the amount you'd like to collect, currency, and whether you want to activate automatic refunds. If activated, a customer will be refunded the moment you cancel a meeting within your Tasks.

Under "payment terms" add any payment-related info you'd like to communicate to your customer, including special discounts and conditions.

3. Schedule Paid Sessions
Now that your meeting type has payment collection enabled, it’s time to schedule your next paid session! You can collect payments for one-on-one meetings scheduled through your personal scheduling link, meeting directory, and website embed.
Collect Payments via a Personal Scheduling Link or Meeting Directory
Copy your personal scheduling link from the meeting type where you’ve enabled Collect Payments. After you’ve copied the URL, paste it into an online message or email. Once received, your invitee can use your scheduling link to pick a time for your meeting from your real-time availability.

Additionally, you can add your personal scheduling link to a meeting directory to create a scheduling page with multiple offerings (ex. intro offer session, follow-up session, etc). In this case, instead of sharing your personal scheduling link, share a link to your directory page, giving your customer a few different meeting choices.

Collect Payments via a CalendarHero Embed
If you want to engage your website visitors at the height of interest, add an embed of the CalendarHero web scheduler to your website. Copy the embed code from your meeting type or meeting directory and paste the code directly on any website page. The CalendarHero embed is especially useful if you’re trying to promote an introductory consultation from your website.
If you choose the inline embed option, the scheduler or meeting directory will appear within your page’s content.

Alternatively, select the slide-out option to add a floating button to your website. When a customer clicks the button, the CalendarHero scheduler will launch as a fixed slide-out.
How to embed CalendarHero on your website →
4. Create Exceptional Customer Experiences
CalendarHero helps you offer your customers the fastest and most convenient way to book and pay for time with you. After your invitee selects a time based on your availability, they’ll be prompted to make a credit card payment powered by Stripe.

Once successfully booked, you and your invitee will be notified and a calendar event will be added to both your calendars. As always, CalendarHero will issue automated reminders to your attendees and you’ll receive meeting briefings with attendee information to help you prepare for your paid sessions.
Learn more about the invitee experience →
Schedule Faster & Grow Your Business
With Collect Payments, CalendarHero takes care of your scheduling and payment logistics, so you can focus on what matters: helping customers, growing revenue, and doing more of what you love.